Tuesday, September 16, 2014

DIY Removable T.V. Tray Ironing Pad


I recently needed an iron. I've done great sewing and not having one so far but I finally started a project that I NEEDED one. My wonderful mom bought me one but I still needed an ironing board. Not wanting to ruin a perfectly good t.v tray with a staple gun, I decided to make something less permanent.

I made some pot holders with a heat resistant type batting and had some left over. I also happen to have a big piece of yellow fabric left over from a diaper cover I made. Put these two together and BAM I have something wonderful.

First I measured my table. I would assume this is a standard measurement but we all know what happens when one assumes. With that said, you should probably measure your own t.v tray. I cut my batting to be 18" by 19" doubled.  This left me a little extra to go over the sides of the tray.  (I don't want to ruin my tray and thought that two layers of batting should keep it protected. You could probably use one layer though, it's really your preference.)

Lay your cotton fabric print side down on the floor or another flat surface that you can easily walk around. Once everything is flattened, lay the batting on top. You want to make sure you have about 6" extra on every side.


I marked out 5" and 6" on the cotton fabric every once in a while and connected the dots to give me a straight line. If you have a yard stick you could probably do this much easier without all the work.
 
Blue lines are the 6" mark on the sides and the pink is the 5" mark.
I drew straight down on the corners of the batting.


Once you have the lines drawn, cut around them to create something that looks like the picture above.
 
Once everything was cut and ready, I pinned the batting square to the cotton. I would pin this often because it can/will shift. If you use one layer it won't shift as much but I used two layers causing more shifting.
 
I don't really know why, but I cut the corners of the batting. Maybe to give me more play in the corners....not really sure and is optional.


After everything is pinned, sew the batting onto the cotton.
 
 
It will probably look something like this once your down. Some of the fabric bunched a little, but this wasn't very notable once I add the elastic and put it on the table. 
 
Next you want to sew the corners together. I put my 5" and 6" lines together and sewed it from there.


After all four corners are done, pin a casing for the elastic. I will use 1/2" elastic and made the casing 1". It is up to you on how big you want your casing and elastic. I would recommend using a wider elastic since you'll need so much and it's going over a bigger object. 

BE SURE TO LEAVE AN OPENING to string the elastic threw....I always forget this.

Once your casing is ready, starting stringing it in.

My elastic measured 33.5". This held the pad on tight while easily stretching over the table. Make the elastic shorter if you want the pad to be on tighter.  (Put a safety pin on the end being run through the casing to help you hold on to something while moving the fabric.)


I clipped the end of the elastic to the opening to make sure it didn't get lost.

Yup the first time I ran the elastic, the end without the safety pin went right in. I had to start over so I clipped it to prevent it from going in the casing.....again!

Once it's all the way in, sew the elastic together. I should of taken a picture of this but sadly didn't. Try the pad on the table before you completely sew the hole up. If you want the pad to fit tighter cut and resew the elastic together. If you want it bigger, cut it and add more elastic. Sew on both ends to add more.

If you are happy with how the pad fits, close up the opening.

 
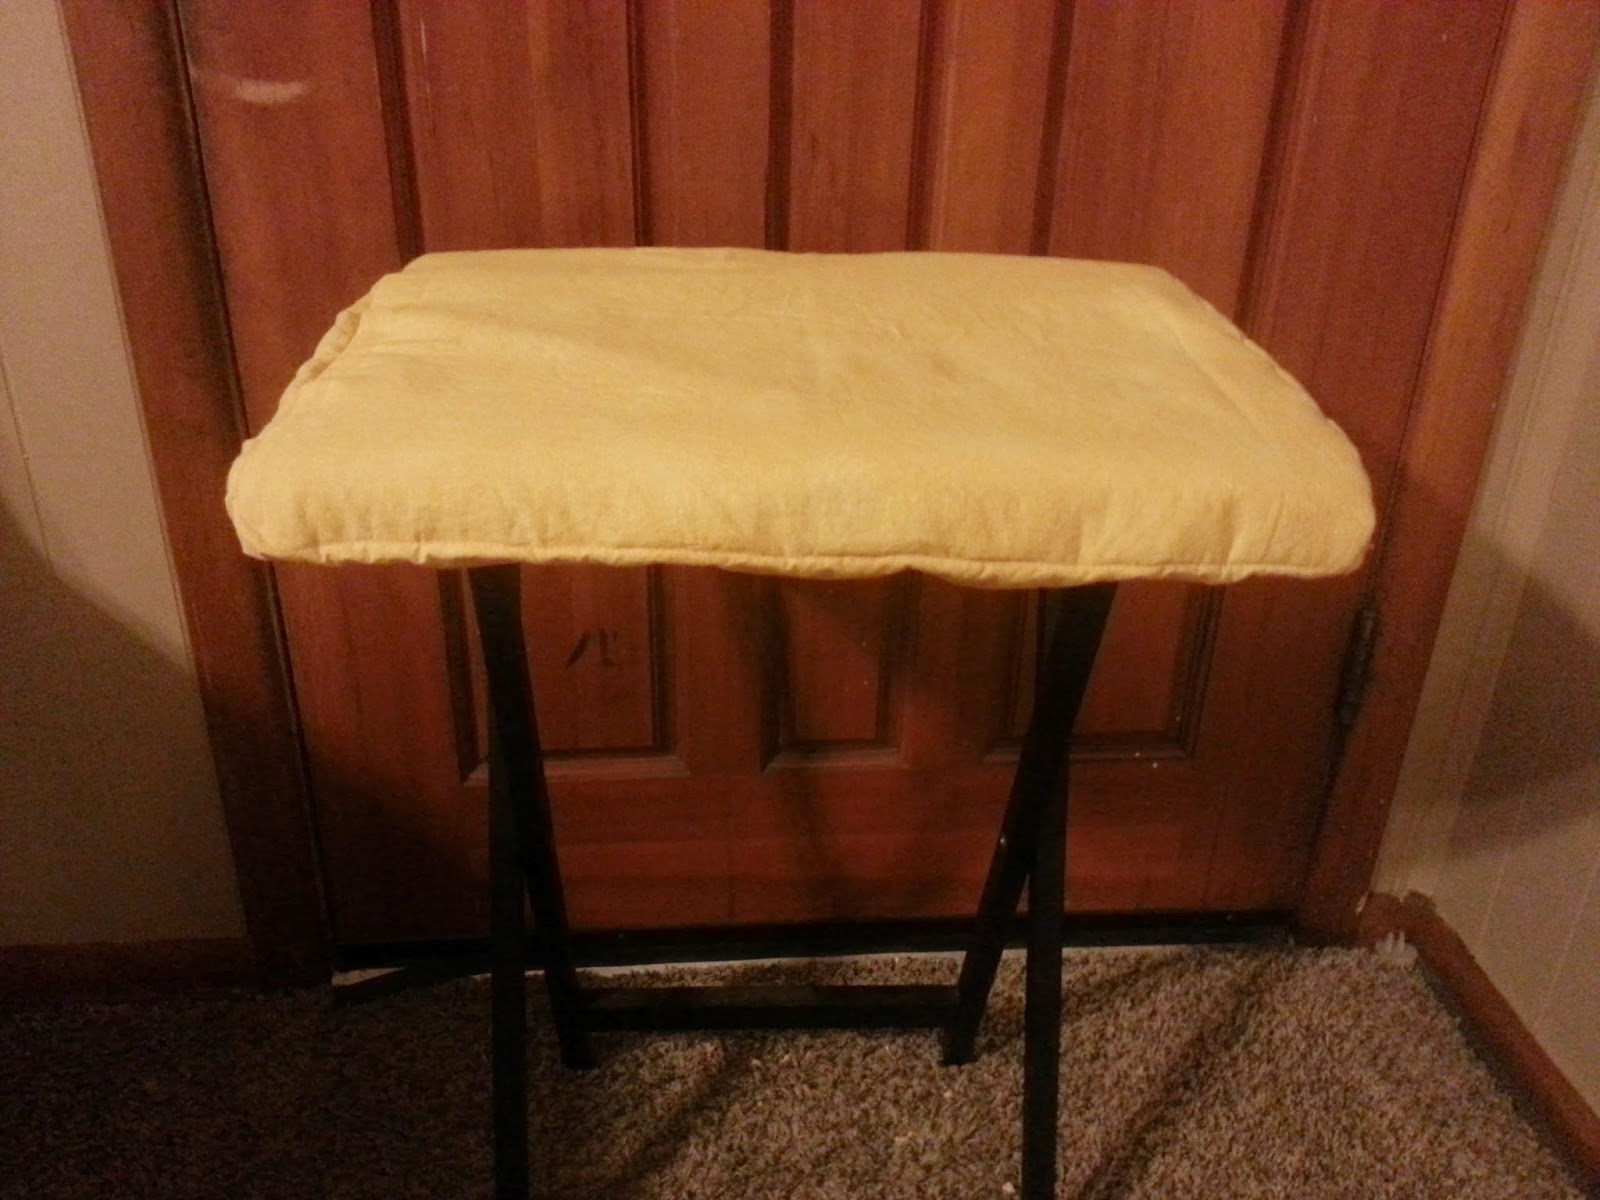
My finished product!!!! Works great for what I use it for. This comes off easily to free up a tv tray or keep it on and store the whole table.


Hope you find this as useful as I do!!

God Bless.


Wednesday, September 10, 2014

Easy Sewing Baby Blanket!!


The other day I was at the fabric store and they had this Ultra Cuddle fabric on sale. It's perfect for blankets and with cooler weather upon us I thought I would make one for my son. Not that we need yet another blanket....but it'll be made by me so it'll be awesome!!

I haven't made a blanket before, and I haven't read any things on how to do it. I just went for it, like usual.

The cotton fabric I had was 35" width and 38" length. The width you can kind of choose depending on the fabric but I've learned this is kind of standard. Of course the length can be changed by how much you buy (by the yard, 36" in a yard). I always buy a yard and a half which gives me some play room.

Since the cuddle fabric stretches I decided to do one side at a time, but if you are brave enough you can pin all of them at once.

First I laid my fabric on the floor and made the first side even. I left the cotton fabric an inch over the cuddle fabric. This gives me enough to fold it and sew. I would like to add that this was roughly an inch. If I was making this to sale I would measure but this is an experiment and decided not to.

Second, fold that extra inch of fabric in half, so you'll have 1/2 an inch. Then fold it again, but over the cuddle fabric. This will prevent the cotton from fraying and give the cuddle a nice border.

 
This is my cotton inch that is longer than the cuddle fabric.

 
I folded it in half, giving me half inch. Try to line the cotton up with the cuddle fabric.
 
 
I then fold it over the cuddle fabric and pin. You want to be sure you have the cuddle fabric inside that little pocket. If it's not in there all the way it has a greater chance of coming out. In one spot I didn't have the cuddle fabric in all the way and it easily came out just by me moving it.

IF THIS HAPPENS..... When this happened to me, I simply lined the cotton and cuddle fabric and sewed it. I tried to hide the stitch as best as possible, and if you use a small stitch it should be hidden by the fabric's fuzziness.

It's up to you on how to do the corner. I simply just folded the fabric so there were no raw edges.

TIPS:

- At the corners, try to have as little cuddle fabric as possible. You want it in the corner so it keeps but you don't want so much it bulks up. This Ultra Cuddle Fabric is semi thick and my machine didn't want to go threw five plus layers of cotton AND the cuddle fabric. I just cut it a little bit more, just remember to cut a little at a time.

- The cuddle fabric DOES stretch so after that first side, don't stretch it too much. This might prevent the blanket from laying flat. I didn't stretch it at all when I began sewing the other sides, I even left a slight slack.

-When going through the machine be sure to have a good grip on all the fabrics. This keeps things from shifting. I would also recommend keeping as much of the blanket as possible on a surface while you sew. It can get heavy and the tension makes things difficult.

-I used a small close together zig-zag for my stitching. This helped to make sure all the fabrics were hit and held together tightly.

-Stop frequently so insure everything is in the right place.

I hope you enjoy. If you're into camo, I do sale these on my Etsy store here. It's not much but I've sold a few things.

Thank you and God Bless.

Please Go and Like My Facebook Page!!!!

Wednesday, September 3, 2014

Hot Glue VS Mod Podge


I saw these leaf candle holders and fell in love with them. I'm not one to decorate my house according to the seasons (because my kids would just take it down and probably ruin it) but I couldn't resist this one.

When I saw it on Pinterest, it said to use Mod Podge. It also said you could use real or fake leaves. I found a bag of 50 at Dollar Tree and snagged them up!! I don't know how either of these would work on real leaves. I would suggest using freshly fallen ones, because once they get dry they would probably crumble when trying to use them. I also don't think real ones would work if you are wanting to make something to last more than one year.

MOD PODGE!!
 
I simply put a nice layer of Mod Podge on the glass jar, and started layering leaves on it. I had to completely cover all the leaves in a layer of Mod Podge due to some leaking around the edges. It made the leaves glossy looking and more fake then they already were. The Mod Podge also didn't dry fast enough which meant the leaves would move around and not stick very well until it dried. I had to put this together through out a day in order to get it covered. Just took too long and looked too fake.
 
 
You can try this if you want but I wanted something faster. If you use real leaves, it might work better at sealing them.
 
HOT GLUE!!!!
 
Sounds crazy, but I just recently got a hot glue gun and was super eager to try it out. I thought this would be the perfect project.  I got my jar and leaves laid out and ready to go!!
 
 
The leaves I used were thin and made with a silk material. Use the SMALLEST amount of hot glue possible, other wise it will seep through the material and stick to your fingers. Just the smallest dot will do. I started by putting it on one point and placing that on the jar. The glue dries fast so know were you want to put it. Once it was on the jar I added dots to the other ends and stuck them to the jar also. It went by pretty fast and even better since the glue dried almost instantly.
 
 
When I was all done, I had a problem. The bottom wouldn't sit evenly due to ends of leaves. On the Mod Podge one I stick them to the bottom, but it still kind of rocks and doesn't sit flat. If you plan to put a candle in, that is an important part. On the hot glue one I decided to just cut and make it as even as possible without it looking like I cut it once in the sitting position.


I loved this and plan to make candles with them (rather than put a tea light in it). Here are my two side by side.
 
 
As you can tell the hot glue one is less shiny looking and I liked it better!! Hope you enjoy trying to make your own!!
 
God Bless!