Tuesday, January 20, 2015

Yes, Toys in the Living Room


This is my great struggle. I have this idea that my house should be perfect all the time. My kitchen counters should have minimal clutter with cute containers for things that belong on the counter. There shouldn’t be a huge pile of dishes at the end of the day and everything should always be in its place. My living room should be a nice sitting area with nothing cluttered. There shouldn’t be socks on the floor (thanks to my husband) and the toys should all be in the children’s room. Right? My house should be like what I see right? Pinterest and HGTV give me plenty of examples and that’s what society expects right? I know I’m not the only one who dreams of a perfect home, but our views as women (especially stay at home moms) are so flawed.

Like any other time, the media has steered us in the wrong direction. Yea, my house might look like that when I’m 50 but I’m 23. I have a long ways to go and my two children don’t understand that mommy’s house should be spotless. And I’m honestly tired of feeling like my house should be perfect, so we have toys in the living room.

My friend has a strict; all the toys stay in the bedroom. She also complains that her son hardly ever plays with his toys but rather her stuff in whatever room she happens to be in. Last time we went over to her house, she had my kids picking up toys almost every 10 minutes. It took my kids an hour to figure out that toys stay in the room. Yes, it was as annoying as you’d imagine.
See the problem here? As a society we want our house to be perfect and the kids to be off playing in their room. This isn’t a 1950’s movie people!!! After comparing my house to hers (which is spotless), I decided I would keep up like she does. It killed me! I was spending more time cleaning than with my children. At the end of the day the house looked great, but nobody was around to see if but me. To top it off, I missed out on countless hours of fun with my kids.
This is (in my opinion) the first step to the whole anti-social generation problem. You want your kids to be alone playing when they’re young but when they become teenagers expect them to be in the living area talking to you? Why? You’re a little late for family bonding.
So yes, my house is a mess. Some days we don’t even pick up our toys till it’s bed time. If you decide to just stop by, it’ll be a complete mess and you WILL have to watch your step. I’ve become okay with this. Why you ask

1: We have a GREAT time. We build with blocks, cook pretend food, roll around on the floor with every pillow and blanket we can get our hands on, build forts, have tickle fights, and sometimes they just spill toys to find that one special thing. And although it’s a mess of toys, we play for hours. We weren’t just playing, we are learning shapes, colors, sounds, new words, animals, letters, number and anything else you could possibly think about.

2: This is how you bond with your kids. When I was young, I played in the living room, and when I got older I still hung out in the living room with my family. If you push a kid to play in their room why should they come out and play when they’re older. I understand they won’t be playing but they won’t want to spend quality time with you. Why should they, you pushed them away. You let a tv do the teaching, the occupying, and didn’t really bond. If you work, you’re tired. You have a lot to catch up on in terms of house work, but that is not worth losing a loving relationship with your child.
So no, my house won’t be perfect. I will have toys and there will always be a mess somewhere. If you don’t like it, leave or don’t come in the first place. We are building an everlasting relationship, a feeling of openness, a line of communication that will always be open.

Someday I’ll have everything in its place. Someday I’ll have my dream kitchen and we won’t have any clutter.  Someday I will have a perfect living room.

Today, I have toys. I have dirty clothes in a pile ready to be washed, I have dirty dishes and clutter on my counters, but that is okay. Because Today I made my relationship with my kids that much stronger, and NOTHING is worth giving that up. One day they won’t be in my house, they will have their own family. When that day comes, I want to be the person they call every week, when they need advice, or when they’re just missing home.                                           

I hope that one day you can be just as okay about your messy living room as I am with mine. Always be thankful for those little people making that mess, because when those little ones are gone, you'll miss the them and the mess.

p.s. I just want to say, we do pick up our toys. I do teach my children that we should pick up the blocks before we get something else out. That doesn’t happen every day, and it’ll take time for them to learn but we are getting there. It’s a slow process, but I try.

Thursday, January 8, 2015

POPCORN!!!


Ok so I haven't written in a long time, I know. I'm sorry. BUT now that Christmas is over, I thought I would share something I did as a secret food Santa gift that was AMAZING!

I'm always looking for cheap things to make for Christmas. My husbands family does this $5 food secret Santa. Which is great, but you can't buy something really good and half healthy for $5. That's barely a Starbucks coffee. JuSt SaYiNg!!

I love making my own popcorn. Popcorn that comes in premade bags is horrible for you, seriously one of the worst things you can eat. I thought it was hard to make old school popcorn, but after I learned, I'll never go back!


Back to the gift I made....

-Chocolate covered popcorn
-Mint Chocolate covered popcorn
-Butterscotch Chocolate covered popcorn
-Butterscotch covered popcorn
-Ranch

This is so simple. First you want to make a big batch of popcorn. Don't use too much oil (or butter popcorn if you MUST use premade popcorn). The extra oil might prevent the chocolate from sticking.

I bought regular chocolate chips, the kind you put in chocolate chip cookies. Put how ever many you want in a pan and melt on LOW!! Chocolate needs to melt at a low temperature because if not it'll burn and won't get the drizzle effect you want.


Lay the popcorn out on wax paper. Once the chocolate is melted, drizzle it on with a spoon. I put mine in the freezer so it would set up faster, but it's up to you if you do this or not.

MINT  Popcorn!! I found peppermint extract at Aldi's. It is the best thing to put in my hot chocolate, but also in my chocolate popcorn. You don't need a whole lot, but of course you have to play with how strong you want it. It will thin the chocolate which makes it easier to spread.

Ranch Popcorn!! This is so simple and way addictive. After the popcorn is cooled, just put some ranch seasoning on it. You can use your own home made one or buy a pack from the store.

Kettle Corn!! This is a dangerous thing. When I first figured out how to make this, I ate an entire pot full (my biggest pot by the way). So Bad!! The secret measurement is 1/2 cup popcorn to 1/4 cup sugar. When the oil is hot enough to pop the corn, add the sugar. Once the kernels are in, shake like crazy to coat them evenly.  The great thing about this is you can change how sweet you want it. I usually make small batches with light sugar, that way I can get my sweet fix without feeling guilty.

This is super cheap to make as a gift or if you're having company over. I hope you enjoy it as much as I did!!

God Bless

P.s. Valentines day is coming up, it'd be cheap and amazing for classroom gifts.

Tuesday, November 11, 2014

Healthy Dessert- Honey Vanilla Greek Yogurt and Cocoa Power


They say that sugar is more addictive than most street drugs...I don't know how true it is BUT it must have some element of truth.

My kids act so much better when they don't eat a bunch of sugar and sweets. It's something we are working on as a family. With that said, it took my two year old daughter all of five minutes to learn every possible hiding spot of her Halloween candy. I only let her have one piece a day, and only if she does something for it. Did I mention she has to ask, because I'm not going to volunteer it!!! LUCKILY it's almost gone!!!!

I confess though.....I ate some. It was great but now I'm always wanting something sweet. The cold baking weather doesn't help either.

With all this said, if maybe you're craving something sweet but are trying to keep the waist line down in preparation for the holidays try this. It is AMAZING!!! Plus the kids LOVED it!!!! 

Put 1/2 Cup of Honey Vanilla Greek Yogurt in a bowl.
Mix in 1/2 tbsp of unsweetened Cocoa Powder (mine was only 5 cal...say what?)


The powder doesn't want to mix with the yogurt so it takes a minute.

This is a great alternative to pudding. The Greek yogurt has the thick consistency and the chocolate will trick you into thinking you're eating something 'candy' like (it will trick the kids anyways).

Please ENJOY!!! It's amazing!!!

God Bless

P.s.  Please like my Facebook page.

Tuesday, October 28, 2014

Home Made Felt Banner


I wanted to make banner for my sons birthday and his first birthday. I had the camo and only needed the felt, making it much cheaper than buying a banner to match his theme.

You can do this project two ways, one is WAY easy and the other is much more complicated.

First I drew my triangle on a piece of paper. I drew an 8 inch line and also marked the 4 inch mark. I drew a straight line down from the 4 inch mark. I than connected all the corners, creating a triangle. I didn't measure to make sure my sides were 8 inches, I wanted them to be a little shorter.


Once I had the triangle I was happy with, I cut it out. I traced this onto the felt before I cut them.

NOTE: Felt is very difficult to wash, and I would advise not washing it at all. If you trace on your felt, use a marker or pen that is pretty much the exact color of the felt.

Now that the triangles are ready, we need to work on the letters. I held my paper triangle up to different sizes and fonts of letters. Once you find one you like, print them out and cut them up.


I than drew them on the back side of the fabric I was using. Don't forget to do the letters backwards so that the aren't backwards when you put them on the banner.
 

The first time I cut them I left myself some room, as you can see. If you want to prevent fraying, leave this extra around so you can sew or use fabric glue to turn them in. It was very tedious, resulting in me only doing one or two that way.

I soon decided that I would just sew them onto the felt triangles and deal with the fraying. If you decide to do that, simply cut the letters out.

 
 I used an iron on adhesive to keep the letters in place on the felt. Once you have them happily and nicely placed, sew around them. I simple straight sew did great, held up amazingly. You might do a small zigzag to help prevent fraying, if you're worried about it.
 
 
YEAH!!!! All your letters are now done. All we have to do is string them together.
 

I would suggest using a thick string, or a small twine like I did. I used a thin thread like string, and it just comes undone and wouldn't hold. You want something that will be strong enough to help hold the weight of the triangles.

Using a hot glue gun, run a line (as evenly as possible) across the top of the triangle. Stick the string on it carefully. I used toothpicks to push the twine into the hot glue.

Leave a little space between each letter so that you have give when you hang them. I left about an inch between each letter.

 
This is my finished project. These would be great to make if you're into photography. You could even do simple ones with two different colors of felt. Or make something like I did to match any party theme. 


God Bless and Enjoy!!

P.S. I made a Facebook page...please take a visit and like my page.


Tuesday, October 21, 2014

Home Made Febreze


I've seen this here and there but didn't really think about it until I needed some. I don't really care for Febreze. The smells always have a weird factor and I'm sure they are packed with all kinds of crap to 'help take out odor'...really?

In preparation for my sons birthday and a bunch of people coming to my house I thought I would freshen up the furniture. I found a recipe that I liked but altered it a touch...worked AMAZINGLY.

You'll need 2 cups of hot water
1/3-1/2 cup of Downy smell good beads (or another brand)
1/8 cup of alcohol
Spray bottle
water to fill the rest of the bottle up.

 First add the alcohol to the spray bottle.

Put very warm or hot water into a two cup measuring cup. Add the scent beads to the water and stir. If the beads don't dissolve all the way that's okay. Mine didn't and I just added the rest of the beads to the spray bottle. They will dissolve, it just takes some time.


After the alcohol and scent water are in the spray bottle, just fill it the rest of the way up. I didn't completely fill mine up, but I did a good portion of the way. Be sure to shake before each use.


The alcohol should take the scent out of whatever you spray it on and the scent from the beads will soon evade your nose!

After mine set for a few days, I though I would try it again. Still worked, but took a minute to smell the scent of the beads. It didn't seem as strong, which actually worked out better for me.


God Blessed!! Hope you can make your house SMELL amazing!

Tuesday, September 16, 2014

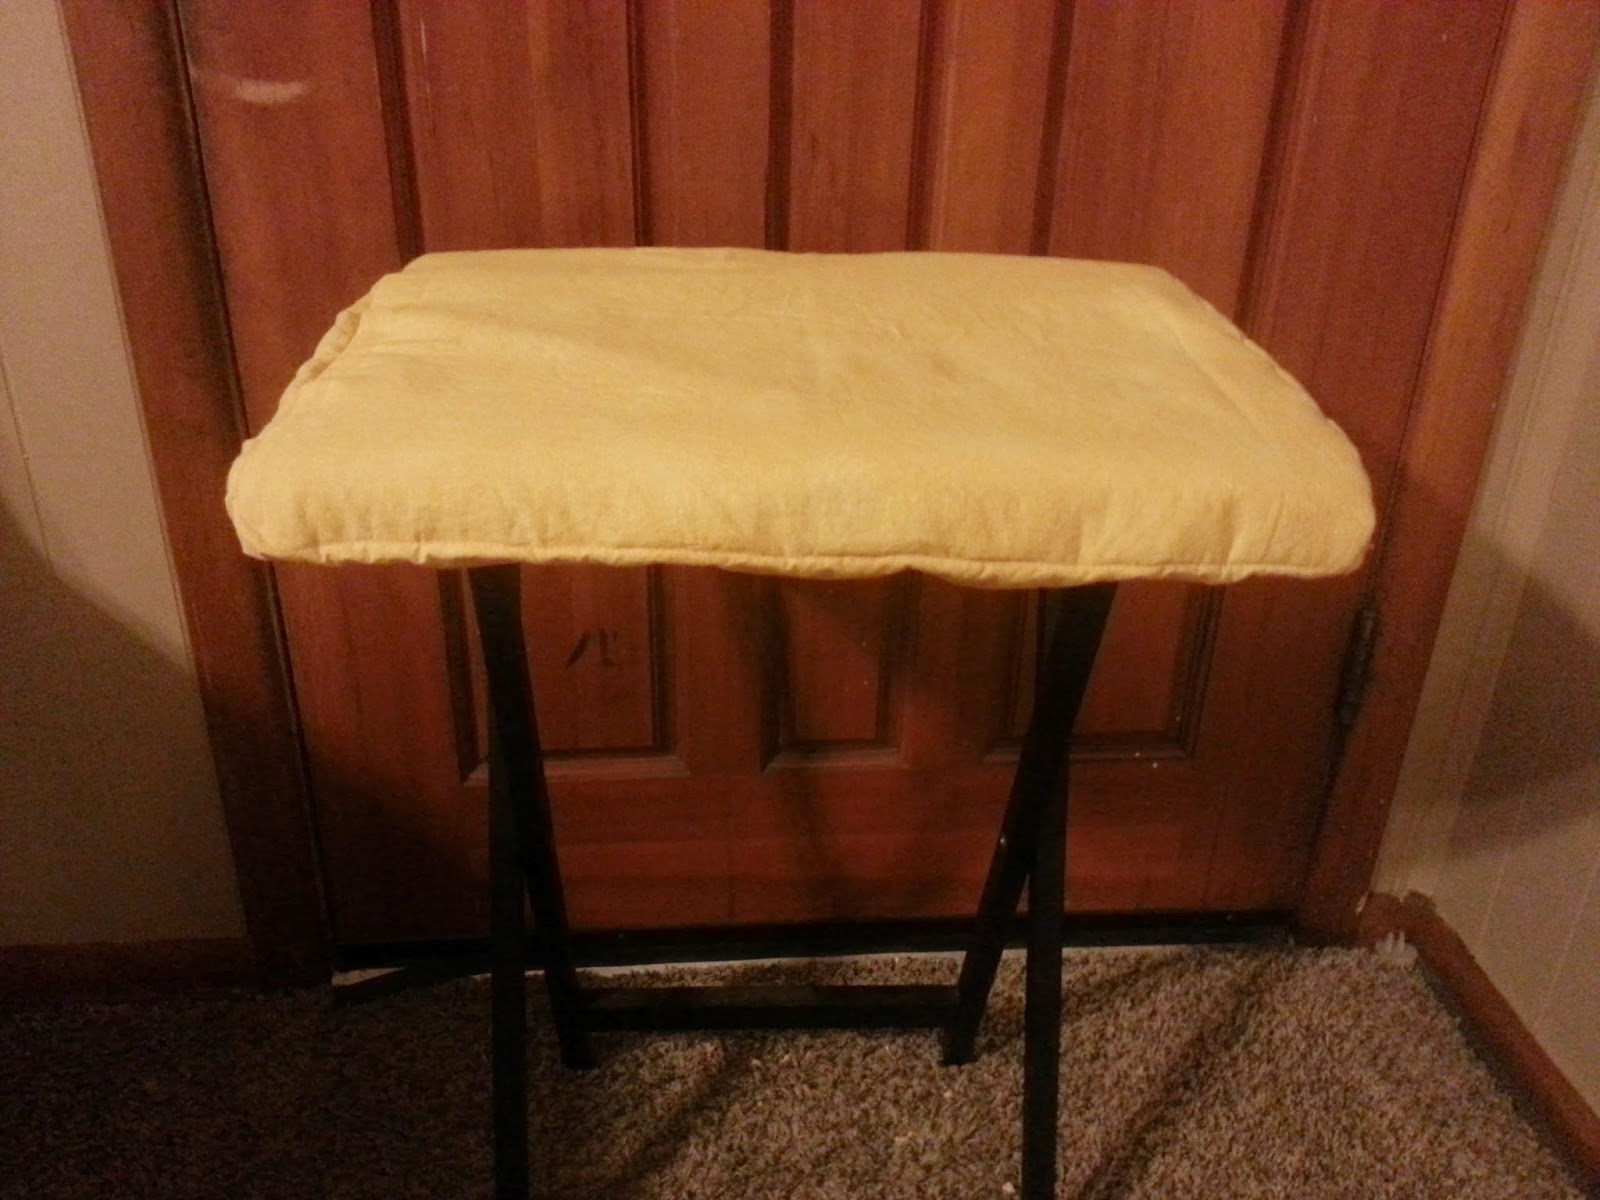
DIY Removable T.V. Tray Ironing Pad


I recently needed an iron. I've done great sewing and not having one so far but I finally started a project that I NEEDED one. My wonderful mom bought me one but I still needed an ironing board. Not wanting to ruin a perfectly good t.v tray with a staple gun, I decided to make something less permanent.

I made some pot holders with a heat resistant type batting and had some left over. I also happen to have a big piece of yellow fabric left over from a diaper cover I made. Put these two together and BAM I have something wonderful.

First I measured my table. I would assume this is a standard measurement but we all know what happens when one assumes. With that said, you should probably measure your own t.v tray. I cut my batting to be 18" by 19" doubled.  This left me a little extra to go over the sides of the tray.  (I don't want to ruin my tray and thought that two layers of batting should keep it protected. You could probably use one layer though, it's really your preference.)

Lay your cotton fabric print side down on the floor or another flat surface that you can easily walk around. Once everything is flattened, lay the batting on top. You want to make sure you have about 6" extra on every side.


I marked out 5" and 6" on the cotton fabric every once in a while and connected the dots to give me a straight line. If you have a yard stick you could probably do this much easier without all the work.
 
Blue lines are the 6" mark on the sides and the pink is the 5" mark.
I drew straight down on the corners of the batting.


Once you have the lines drawn, cut around them to create something that looks like the picture above.
 
Once everything was cut and ready, I pinned the batting square to the cotton. I would pin this often because it can/will shift. If you use one layer it won't shift as much but I used two layers causing more shifting.
 
I don't really know why, but I cut the corners of the batting. Maybe to give me more play in the corners....not really sure and is optional.


After everything is pinned, sew the batting onto the cotton.
 
 
It will probably look something like this once your down. Some of the fabric bunched a little, but this wasn't very notable once I add the elastic and put it on the table. 
 
Next you want to sew the corners together. I put my 5" and 6" lines together and sewed it from there.


After all four corners are done, pin a casing for the elastic. I will use 1/2" elastic and made the casing 1". It is up to you on how big you want your casing and elastic. I would recommend using a wider elastic since you'll need so much and it's going over a bigger object. 

BE SURE TO LEAVE AN OPENING to string the elastic threw....I always forget this.

Once your casing is ready, starting stringing it in.

My elastic measured 33.5". This held the pad on tight while easily stretching over the table. Make the elastic shorter if you want the pad to be on tighter.  (Put a safety pin on the end being run through the casing to help you hold on to something while moving the fabric.)


I clipped the end of the elastic to the opening to make sure it didn't get lost.

Yup the first time I ran the elastic, the end without the safety pin went right in. I had to start over so I clipped it to prevent it from going in the casing.....again!

Once it's all the way in, sew the elastic together. I should of taken a picture of this but sadly didn't. Try the pad on the table before you completely sew the hole up. If you want the pad to fit tighter cut and resew the elastic together. If you want it bigger, cut it and add more elastic. Sew on both ends to add more.

If you are happy with how the pad fits, close up the opening.

 
My finished product!!!! Works great for what I use it for. This comes off easily to free up a tv tray or keep it on and store the whole table.


Hope you find this as useful as I do!!

God Bless.


Wednesday, September 10, 2014

Easy Sewing Baby Blanket!!


The other day I was at the fabric store and they had this Ultra Cuddle fabric on sale. It's perfect for blankets and with cooler weather upon us I thought I would make one for my son. Not that we need yet another blanket....but it'll be made by me so it'll be awesome!!

I haven't made a blanket before, and I haven't read any things on how to do it. I just went for it, like usual.

The cotton fabric I had was 35" width and 38" length. The width you can kind of choose depending on the fabric but I've learned this is kind of standard. Of course the length can be changed by how much you buy (by the yard, 36" in a yard). I always buy a yard and a half which gives me some play room.

Since the cuddle fabric stretches I decided to do one side at a time, but if you are brave enough you can pin all of them at once.

First I laid my fabric on the floor and made the first side even. I left the cotton fabric an inch over the cuddle fabric. This gives me enough to fold it and sew. I would like to add that this was roughly an inch. If I was making this to sale I would measure but this is an experiment and decided not to.

Second, fold that extra inch of fabric in half, so you'll have 1/2 an inch. Then fold it again, but over the cuddle fabric. This will prevent the cotton from fraying and give the cuddle a nice border.

 
This is my cotton inch that is longer than the cuddle fabric.

 
I folded it in half, giving me half inch. Try to line the cotton up with the cuddle fabric.
 
 
I then fold it over the cuddle fabric and pin. You want to be sure you have the cuddle fabric inside that little pocket. If it's not in there all the way it has a greater chance of coming out. In one spot I didn't have the cuddle fabric in all the way and it easily came out just by me moving it.

IF THIS HAPPENS..... When this happened to me, I simply lined the cotton and cuddle fabric and sewed it. I tried to hide the stitch as best as possible, and if you use a small stitch it should be hidden by the fabric's fuzziness.

It's up to you on how to do the corner. I simply just folded the fabric so there were no raw edges.

TIPS:

- At the corners, try to have as little cuddle fabric as possible. You want it in the corner so it keeps but you don't want so much it bulks up. This Ultra Cuddle Fabric is semi thick and my machine didn't want to go threw five plus layers of cotton AND the cuddle fabric. I just cut it a little bit more, just remember to cut a little at a time.

- The cuddle fabric DOES stretch so after that first side, don't stretch it too much. This might prevent the blanket from laying flat. I didn't stretch it at all when I began sewing the other sides, I even left a slight slack.

-When going through the machine be sure to have a good grip on all the fabrics. This keeps things from shifting. I would also recommend keeping as much of the blanket as possible on a surface while you sew. It can get heavy and the tension makes things difficult.

-I used a small close together zig-zag for my stitching. This helped to make sure all the fabrics were hit and held together tightly.

-Stop frequently so insure everything is in the right place.

I hope you enjoy. If you're into camo, I do sale these on my Etsy store here. It's not much but I've sold a few things.

Thank you and God Bless.

Please Go and Like My Facebook Page!!!!